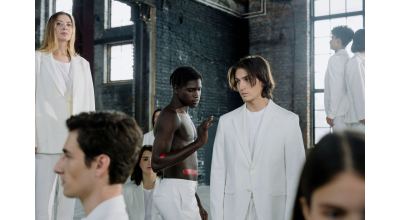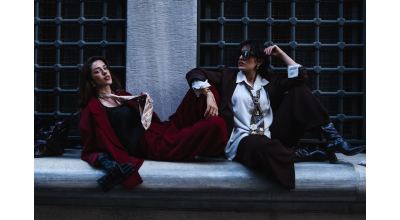
You know that feeling when you’re walking through Dumbo, past the cobblestone streets and the iconic Manhattan Bridge backdrop, and you snap a shot that just nails the vibe? And then, after a bit of magic in post-production, it goes from a great photo to an absolutely breathtaking, jaw-dropping masterpiece? That transformation, that journey from raw capture to polished perfection, is pure gold – especially on social media. We all know a good 'before & after' shot can stop scrolls in their tracks. Whether you're showcasing a retouching miracle, a dramatic lighting change, or a styling evolution from a quick concept sketch to a full-blown editorial shoot in a Tribeca loft, seeing that transformation side-by-side just hits different. It tells a story, reveals your skill, and frankly, it just looks cool. As a working photographer here in the concrete jungle, I’m always on the hunt for ways to make our work shine brighter and engage our audience more effectively. And let me tell you, I've been playing around with a fantastic free tool that makes creating these viral-worthy comparison images ridiculously easy, and I had to share it with my fellow creatives and models.
The Secret Weapon: Introducing the Before/After Slider
Seriously, this thing is a game-changer for engagement. I'm talking about the Before/After Slider from dantet9.com. You just upload your two images – say, the raw shot straight out of the camera from that moody West Village street shoot and the final, color-graded, blemish-removed, perfectly cropped stunner – and it instantly generates a sleek, interactive slider. You know the kind where you can drag a line back and forth to reveal the transformation? That's it! And the best part? You can then easily screenshot or screen record this dynamic slider for your Instagram Reels, TikToks, or even a compelling carousel post.
No complex software, no subscriptions, no fussing with layers and masks in Photoshop if you're just looking for a quick, impactful comparison. This is pure, unadulterated comparison goodness, designed to make your work pop. Think about it: that messy studio before cleanup vs. the immaculate, art-directed set ready for a high-fashion shoot in Midtown. Or the difference between natural light from a window in a Bushwick apartment versus a carefully sculpted strobe setup. The tool is intuitive, fast, and most importantly, it delivers a professional-looking result that screams "look at the magic I just performed!"
Why Before/After Sliders Are Your New Best Friend for Engagement
In the competitive landscape of social media, especially here in New York where everyone's hustling to get noticed, you need every edge you can get. A static "before" and "after" image side-by-side is good, but an interactive slider? That's next level. It draws people in, makes them actively engage with your content, and holds their attention for longer. It's not just a passive consumption of an image; it's an experience.
I've seen firsthand how these sliders can boost engagement. When I share a slider comparing a model's natural look to their fully styled, editorial transformation for a shoot in Times Square, the comments blow up. People are genuinely fascinated by the process, by the subtle (and sometimes not-so-subtle) changes that go into creating a professional image. It sparks conversation, encourages questions about your techniques, and most importantly, it builds trust and demonstrates your expertise. It’s a powerful way to show, not just tell, the value you bring to the table.
Showcasing Your Retouching Prowess
Let's be real, a huge part of what we do as photographers, especially in the fashion and portrait world, is post-production. From subtle skin smoothing to dramatic background swaps, retouching can transform an image. Using the Before/After Slider, you can visually break down the impact of your retouching skills without having to explain it in lengthy captions. Upload the raw file – maybe a headshot taken in a bustling Union Square park, complete with stray hairs and slight skin imperfections – and then the retouched version. The slider instantly highlights the subtle enhancements, the color corrections, and the overall polish that makes your work stand out. It’s a fantastic way to educate clients on the value of professional retouching and justify your rates.
The Power of Lighting and Styling Transformations
Think about a model walking into our studio, fresh-faced and ready for a shoot. Then, after an hour with our stylists and makeup artists, they emerge as a completely different persona, ready for their close-up. Or consider the difference a single gelled light can make in a dramatic portrait. These are the stories the Before/After Slider tells so powerfully. You can show the initial setup – perhaps a simple backdrop and available light – versus the final shot with carefully positioned strobes, reflectors, and modifiers that sculpt the light perfectly for a dramatic look.
For models building their portfolios, this is invaluable. Imagine showing potential agencies or clients the raw, test shoot images versus the final, retouched, and artistically lit shots. It's a clear demonstration of your versatility and how you transform under different creative directions. From a simple white seamless in our NYC studio to a gritty, high-fashion street shoot in the Lower East Side, the evolution of a look can be instantly captivating with this tool.
Endless Creative Applications for Photographers and Models
The beauty of the Before/After Slider isn't just limited to showing off retouching. It's a versatile tool that can be integrated into so many aspects of your creative workflow and social media strategy. As a photographer, it helps me communicate my vision and process. As a modeling agency, it's a fantastic way to highlight the transformation of our talent and the skill of our creative teams.
Documenting Creative Processes and Set Builds
We all know the effort that goes into a truly epic photoshoot. From conceptualization to set design, prop styling, and wardrobe fittings, it's a journey. Use the slider to show the initial bare studio space or location – maybe a raw industrial loft in Bushwick – and then the fully dressed set, ready for action. Or perhaps a rough sketch of a concept next to the final executed shot. This gives your audience a glimpse behind the curtain, making them feel more invested in your work and appreciating the dedication involved. It’s a fantastic storytelling device that goes beyond just the final image.
Visualizing Different Looks and Moods
Imagine you're doing a test shoot with a model in Central Park, aiming for multiple looks. You could use the slider to compare two entirely different styles on the same model – one soft and ethereal, another edgy and urban. This effectively demonstrates the model's versatility and your ability to capture various moods. It's a dynamic way to present a mini-portfolio within a single, engaging post, perfect for showing off range to casting directors or potential clients. Think about comparing a vibrant, high-key shot with a dark, moody low-key image, both of the same subject, to truly showcase stylistic breadth.
Educational Content and Client Presentations
Beyond social media, this tool can be incredibly useful for educating clients or even for workshops. Imagine explaining the impact of a specific lighting technique or a particular lens choice. You can create a slider comparing a shot taken with a wide-angle lens versus a telephoto, or one with a softbox versus a beauty dish. It makes abstract concepts tangible and easy to understand. For client presentations, it's a compelling way to show them the "magic" you perform, justifying your rates and building confidence in your expertise. When a client sees their raw image transform into a magazine-ready shot with a simple swipe, they understand the value of your art and craft.
How to Integrate the Slider into Your Workflow
It's ridiculously simple, and that's why I love it. You don't need to download any software or have advanced tech skills. Just head over to the Before/After Slider page on dantet9.com.
Step-by-Step for Maximum Impact
- Select Your Images: Choose your "before" and "after" images. Make sure they are well-aligned for the best comparison effect. For instance, if it’s a portrait, try to have the subject in roughly the same position in both shots. This helps the viewer focus on the changes rather than getting distracted by shifts in composition.
- Upload: Drag and drop or upload your two images onto the tool. It's quick, easy, and hassle-free.
- Generate: The slider is generated instantly. You'll see your interactive comparison right there in your browser.
- Capture Your Content: This is where the magic happens for social media.
- Screen Recording: Use your phone's or computer's screen recording function to capture yourself dragging the slider back and forth. This creates a dynamic video perfect for Instagram Reels, TikTok, or even a LinkedIn post. Add some trending audio or a quick voiceover explaining the transformation!
- Screenshots: If you prefer a static image, take multiple screenshots at different slider positions. You can then compile these into an engaging carousel post, prompting viewers to "swipe to see the transformation."
- Share and Engage: Post your captured content across all your social media platforms. Ask questions in your captions, like "What's your favorite part of this transformation?" or "Can you spot all the changes?" Encourage comments and discussions – that's how you boost engagement!
Pro Tips for Optimal Results
- Consistency is Key: For the most impactful comparison, ensure your "before" and "after" images are similar in terms of framing and subject position. This allows the viewer to focus purely on the transformation itself.
- High-Quality Images: Always use high-resolution images for both the before and after. The tool handles them beautifully, and it ensures your final visual content looks crisp and professional.
- Tell a Story: Every before/after tells a story. Use your caption to elaborate on what changed, why it changed, and the creative vision behind it. Was it a dramatic wardrobe change for a fashion shoot in the Garment District? Or a subtle light adjustment that completely altered the mood of a portrait?
- Experiment with Different Angles: Don't just stick to retouching. Try comparing different camera angles or lens choices for the same subject to showcase creative decisions.
Beyond the Tool: Elevating Your Visuals
While the Before/After Slider is an incredible asset, remember it's just one piece of the puzzle. The foundation of any great comparison is, of course, a great "before" and an even better "after." That's where the expertise of a professional photography studio comes in. Whether you're a model looking to build a portfolio that truly stands out, or a brand needing compelling visual content that tells a powerful story, having high-quality images is paramount.
We at Dante's Models are constantly pushing the boundaries of visual storytelling. We understand the nuances of lighting, styling, and post-production that transform a simple concept into an iconic image. From our state-of-the-art studio in NYC to on-location shoots across the five boroughs, we're dedicated to creating visuals that captivate and convert.
So, if you're ready to take your images from "before" to "WOW!" – the kind of transformation that the Before/After Slider truly shines a light on – then it's time to collaborate with the best. Give the free Before/After Slider a try, and watch your engagement soar. And when you're ready for the next level, for images that demand attention and set trends, then reach out to us.
Ready to transform your vision into reality and create those truly unforgettable before/after moments? Book a photoshoot with Dante's Models today at dantet9.com and let's make some magic happen!
Cover photo by Francesco Ungaro on Pexels.